Wednesday, December 21, 2011

A Beautiful Holiday Ham

 
Here is a very special holiday installment of Prolefood, complete with a new process.

Holidays are such wonderful times of friends, family, and of course food.  I actually think that the holidays, especially around the winter solstice, tend to be a time where people actually cook things together, and from some modicum of scratch.  It may be the last holdout in a culture which prizes quick, fast, and easy (how many cookbooks have that in the title these days?)*.  So, in the spirit of cooking together I give you a process for a delicious, hand-crafted, smoked ham - entirely too late for any of you to use it for the holidays (sorry...), but maybe next year?  Or at some random point during this year?

On the Transmutation of Ham

Hams come in so many different shapes and sizes and varieties.  Smoked, brined, cured, fresh, bone-in, boneless, etc.  However, most of what you can purchase in the store has one thing in common, industrial-scale processing.  So, from the start, I will say that this process is rather involved, and won't save you any money.  Not a cent.  You can go out and buy a smoked ham from your grocer for a buck a pound or so.  So why would you want to take this on?

First, because you can source all your ingredients, including the pig; Second, you can control how much or little salt you have in your ham; Third, it is the most delicious, wonderful thing you will ever eat and you will seriously question ever having purchased a crappy supermarket ham in the first place.  So here it is, a ham transmuted from the leaden heft of a pig's rear leg to the aery gold of smoked ham.  I will do this in three steps, like the ancient alchemists.

Step 1: Brine
- 1 Fresh Ham from a happy pig (ask your butcher)**
- A brine, consisting of: 4L (~1 Gal) Water, 350g (~1.5C) Kosher Salt, 225g (~1C) Brown Sugar, 42g (1.5 oz) Pink Curing Salt (Sodium Nitrate), a pour of molasses and any a creative, but restrained bundle of herbs.
- A large, non-reactive brining container
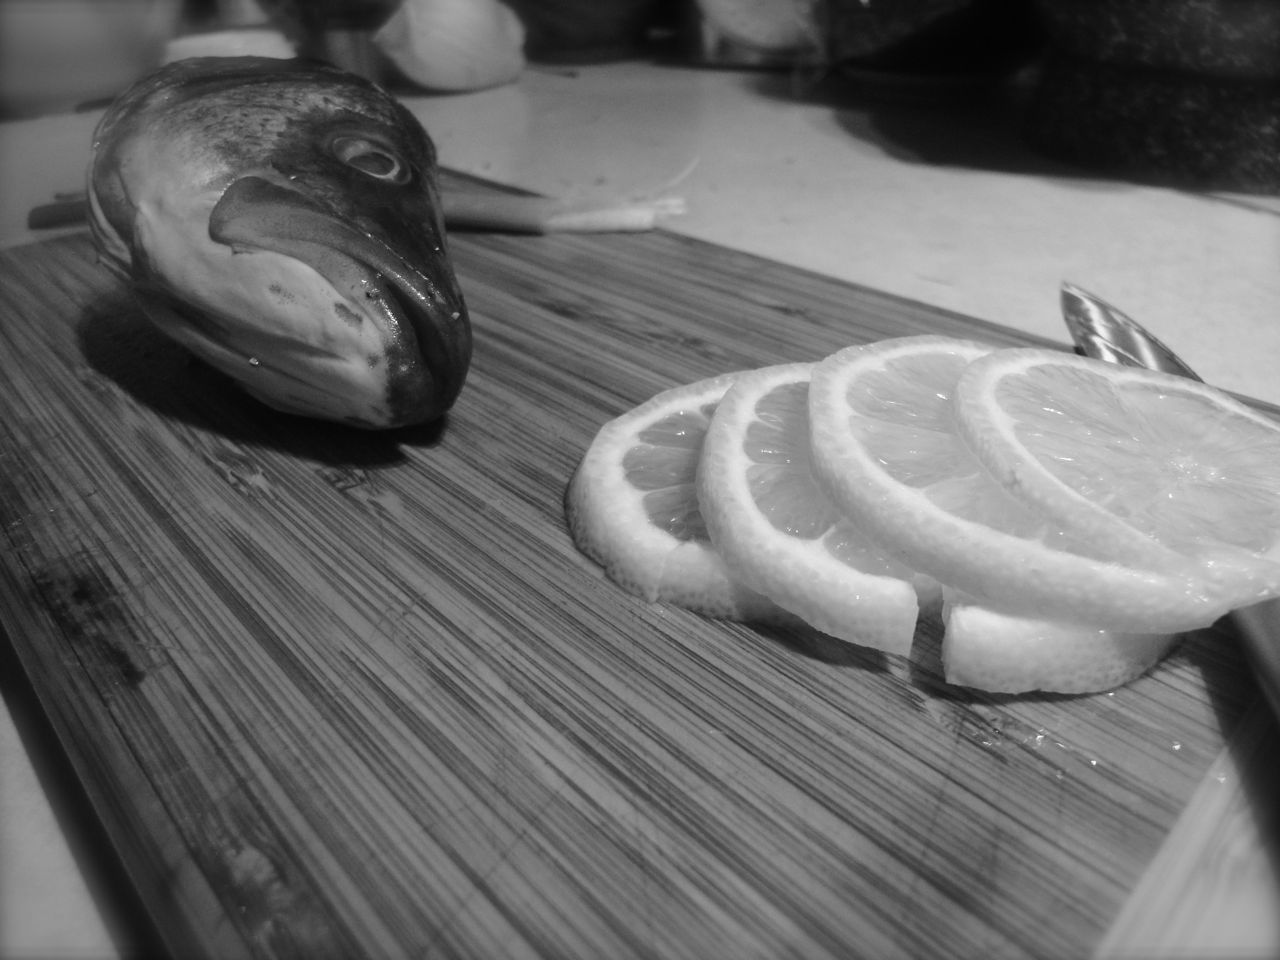
So, to start with, a "ham" is really just the thigh leg of a rear leg of a pig with feet and hocks removed.  So, you can indeed buy these fresh at a reputable butcher (just ask for fresh ham, not cured or smoked).  The full ham will run around 2 lbs on a full sized pig, although you can probably find some heritage breeds like a guinea hog that would have a smaller one.  If the prospect of dealing with such a large piece of meat frightens you, either ask for a half ham or you can also use a cut known as the 'picnic shoulder,' although this won't be a ham, it will be a shoulder.

So, I would also suggest asking your butcher to remove the aitch-bone (pelvic bone) that runs through the ham***.  The ham might also have skin on it.  It is up to you whether you would like to leave it on or take it off.  On will make for a slightly more flavorful, jucier ham, albeit one that requires the removal of the skin prior to eating.  You can certainly debone & skin the ham yourself, I did because I love butchering, but you may find it difficult and/or dangerous especially if you have dull knives and an unskilled hand.  Your butcher should also be willing to tie your ham for you so that it doesn't flop around.  If you do this yourself, just get butcher's twine and tie it up so that it looks ham-like in shape, and not a flesh explosion.  The brine above will work for a 9-16 lb ham.  I did mine in half so that I had two 9 lb hams rather than a single monster.

You know the deal with the brine, put it all in a pot, heat it to boiling or until everything dissolves, then cool to room temperature first, followed by fridge temperature.  Once cool, place your ham in the brine, weighting it down if necessary so that it stays submerged and keep in the fridge or a cold place for 7-10 days.  At the end of the time you choose, dump out the brine and cover with fresh water for a day or so to lessen the fierceness of the salt brine.

Step 2: Smoking

Before smoking, take your ham out of the brine and let it sit in the fridge, uncovered on some kind of elevated rack (so that air gets on all surfaces) for a day or two.  This will make the exterior slightly tacky and far more accepting of the smoke's kiss.  

After sitting you can smoke your ham.  Smoking a large piece of meat like this takes some time and patience, as it will take from 6-8 hours depending on the size of your ham.  Get your smoking device up to 180-190º F and add some chips.  You'll also want to keep some moisture inside the cabinet, water, apple juice/cider, or red wine are all options.  Hot-smoke your ham for the allotted time, although a meat thermometer is also important here, as time is not as important as getting it to around 160º.  It will probably take 6-8 hours though. 

When done, get your now-beautiful ham out of the smoker, wrap in tinfoil, and place in a cooler for an hour and half, covered by a towel.  This will keep the juices in and finish the process for you.  After an hour and a half, take it out, wrap tightly in plastic wrap and then tinfoil and place in your fridge for three or four days to let all the flavors really develop.

Step 3: Roasting and Glazing

Now, your ham is fully cured, and cooked and you could probably have a piece now if you would like, but half the beauty of the ham is the roasting and glazing.  As your ham is now cold, you'll need to roast it in a 350º oven for a few hours until it is back up to the 160º-ish mark.  

During the roasting, baste liberally with a glaze that should, at a minimum, contiain molasses, dry mustard, and some water or wine to thin it a bit.  Be creative, though remember to keep flavors in a generally restrained profile: oranges, apples, warm spices****, and full wines do the trick.  

Take it out, slice it, and serve it to your family - be amazed at the transmutation of pork.

*Every one by Rachel Ray.

** Be sure to bring something that can carry this chunk of meat. I slung mine over my shoulder, which I am sure looked quite strange as I walked down my residential street.  

*** If you keep the bone in, you'll need to inject brine all around it so that you don't end up with a botulism ham, which would kill your entire family and really wreck the holiday spirit.  So, just take the bone out and use it for soup or something.  Much easier.

**** Don't do that obnoxious thing where you stick cloves all over it.  It is annoying and tastes bad.  Also, don't serve it with pineapple, unless you live in Hawaii, in which case you have some justification for doing so.

Monday, October 31, 2011

Not an End, A Transformation


As I sit in my office with papers strewn about, Greek lexicons open on the coffee table, an offprint from the 8th International Congress on Coptic Studies to my left, and Crowley's Book of the Law to my right I realized that I must come to a reckoning. 

The reckoning is that Prolefood needs a transformation of sorts, as I began this whole work during a different time in my life.  I don't really want to end the blog, as I did enjoy it, and refer back to many of my own processes from time to time as I need a refresher.  So, I will keep the blog up for the sake of posterity (as long as I am able), but the entries will be by request only (I always want to order those items on a menu that say "by request only," but rarely have the foresight or requisite funds). 

So, for you, the readers if any of you are left after my most grievous absence, should  you come upon a particular food stuff that you are simply sick of buying in the store, or even sick of paying someone at a farm market a premium for*, comment here or elsewhere and I promise you that as I am able, I will both make it myself, and throw together a classic process for you and others to follow.  I hope all of you are not excessively sad.  Nothing ever ends. 

See you on the other side!  I leave you with a picture of young durian fruit.  They look cute now, but they smell so very bad.

* I am all for supporting local farms and such, so continue to do so if you like.  However, I went to a farm market and saw that they had 3/4 lb. packages of bacon for 12 dollars - 12 filthy dollars.  People bought it up too!  It was frozen (one of the biggest shortfalls of local farms, as frozen meat is not good meat), and surely from a happy pig, but you can make bacon for so much less!

Thursday, June 30, 2011

Redundant Velvet


Being that I am learning French, I can now tell you that our next mother sauce, the velouté, has a nice translation in the term 'velvety.'  So, when I was thinking up a name to use for the post, I thought I might go with "Velvety Velouté,"  but, I realized that this would literally mean "velvety velvety" - hence the new title.

As with the other sauces, you will do well to have this one in your back pocket.  It whips up in a flash and is easily adapted.  It is of great use when one is in serious need of something to tie the plate together.  For example, my lunch today consisted of some toast, lamb kidneys, and garlic scapes.  Though cooked with plenty of butter, the dish seemed a bit less than it could be. So, a velouté was born and added, with some fresh parsley to counter the gorgeous must of the kidneys to create a dish that really made my day (and would make yours as well). My velouté is really more of a sauce vin rouge, and is a bit on the dark side.

Non-redundant Velouté
- Equal parts Flour and Butter (preferably homemade) for a roux
- A light stock (this can really be anything -obviously homemade-, fish, chicken, veal, pork, a mixture - the only rule is that one ought not use a stock with roasted bones in it - too dark)
- Seasonings
The previous mother sauce was the bechamel, which was a white sauce, made with milk or cream and thickened with a roux.  The velouté is, simply speaking, a non-white sauce, made with stock, and thickened with a roux.

So, as with the other process, use your butter and flour to make a roux.  You know the deal, melt the butter, sprinkle flour on top, stir, and cook lightly.  You can let this one brown just the lightest bit, as it will lend a nice nutty flavor to your sauce.

Stir in your stock, and whisk away, allowing everything to get to know one another.  Kick your heat back too, as too furious a boil will thicken your sauce prematurely, not allowing for any development of flavoring.  Give a taste once things are on the thick side and season as needed. 

This one is also very easy.  A general rule of thumb is to match the stock you use to whatever you are using it on.  So, chicken stock velouté for chicken, fish velouté for fish, and *shudder* some rubbish like chickpea or whatever you vegetarians use for stock for a disgusting vegetarian velouté. 

Derivatives:
- Sauce albufera: Add pan drippings, or reduced juices from your meat to the stock.  This will darken things up, hence a different name.
- Sauce allemande: Add a squeeze of lemon, stir, a splash of cream, add some sauce to a couple of egg yolks in a separate dish, then add them back in and cook slowly and lightly for a few.
- Sauce bercy: Add some shallots, white wine, and a turn of lemon to a fish velouté.
- Sauce ravigote: Add a splash of acid, onions, and shallots to a fish velouté (better than the bercy for a very delicate fish)
- Sauce suprême: Add mushroom liquor (water in which one has boiled mushrooms) and cream.

Saturday, June 25, 2011

Hey, Hey, My, My...

Prolefood will never die.  The syllables worked out just right on that one.  I just wanted to throw a quick post up to say that I will continue with the rest of the mother sauces this week.  The past few have been a bit crazy, with a move to Boston, unpacking (how do you expect me to make a beautiful velouté with my kitchen supplies in boxes?), commencant mes cours de français à Harvard, and getting to know my new village. 

In the meantime, enjoy a few Campari and white wine, tune into the above song by Neil Young and practice your other skills.

Friday, June 3, 2011

Hard to Easy


We started last post with a Hollandaise, which is one of the harder mother sauces to master.  So, today's mother sauce should really be a piece of cake.  Like so super simple that if you mess it up, you should stop trying to cook right now*.  A simple comparison should suffice.  

When I first started driving, I was truly an awful driver,  I regularly ran the tire of the car up onto the curb, slammed on the brakes/didn't hit the brakes hard enough, and parking was just...forget it.  Then, my grandfather added driving a stick shift into the mix - I only got worse, once almost crashing into my grandmother's car in a terrific way because I was excited that I managed to get the truck into gear in reverse. Nightmarish.  However, one day I got driving a stick shift down, didn't send my grandfather's truck shuddering and clunking out of every stop sign, didn't roll back 5 feet on every hill, didn't ramp the truck up on grassy embankments when trying to do a K-turn - I got it.  Then, I suddenly became a great driver.  Everything else was measured from that point on in terms of getting the hang of a standard transmission.  Get the Hollandaise down and all of the other mother sauces will be measured in terms of it.  None of this 'gradual increase in difficulty' bullshit.  Do the Hollandaise first.

In any case, today's mother sauce is the ubiquitous Béchamel, aka 'white sauce.'  No cook should be without the means and knowledge to whip up a quick, delicious Béchamel on a moments notice.  It has many uses and all add complexity to dishes.

Standard-shift Béchamel 
- Equal parts butter and flour
- Milk (whole or cream)**
- Seasonings (creative but restrained)***
Your Ratio for the butter/flour mix (aka a roux, we'll talk later) and milk should be something like 5:1.  Not to be a pedant, but that might mean, for example, 1/2 cup of roux (so 1/4 cup flour to 1/4 cup butter) to 2.5 cups of milk or cream.

Start by angrily scalding your milk or cream.  So many recipes call for such gentleness and nicety when dealing with your dairy - here is one time that you can really get some stuff out and just boil your milk or cream.  Don't get out of control, if you burn your milk or cream to the bottom of your pot, cleaning will certainly remind you of the need for some moderation, even when angry.  Let it calm down a bit off the heat while you turn to your roux.

A roux is in very basic terms, flour and fat.  You can make it with butter, or lard, or tallow, or even a rancid vegetable oil.  For a nice Béchamel, use butter.  Start by melting your quantity of butter  over a gentle heat in a saucepan large enough to hold all your milk, wait until the foam subsides, and gently sprinkle your flour over the butter, stirring intentionally with your other hand.  Be sure that the butter and flour really meet one another, you may start with a creamy kind of consistency, but you should soon have a grainy look that indicates that your flour and butter have met fully.  Your roux should remain light in color, don't allow it to brown a bit for Béchamel.

Now, kick your heat back to a low level, and add your scalded milk, one ladle at a time, whisking (the whisk is ubiquitous!) between each to be sure that the sauce stays smooth.  Once all of your milk or cream is added, continue whisking, keeping an eye on things to be sure that the sauce thickens, but not too much****.  Give your sauce a taste, and season as is needed.  

So, as you might notice, many recipes call for a Béchamel sauce, but they usually don't call it such.  On my good friend Margaret's blog, she has a recipe for Kohlrabi that looks as if it will really take the edge off, leaving you in the kind of chirpy state that everyone strives for (click here to see!).  Note her recipe - butter, flour, milk...Béchamel!  

Derivatives:
 - Mornay: Add some cheese (something gloppy and melty like Gruyére) once the sauce has thickened.
- Aurore: Add some tomato purée at the end.
- Nantua: Add crayfish tails and a touch of fish sauce or splash of fish stock.
- Soubise: Add some finely diced onions to the boiling milk.
- Béchamel is often used over things like white lasagna or slathered on crêpes, be creative and unrestrained!

* Harsh, right?

** Don't even bother with anything less than whole milk.  Gross.

*** A lot of traditionalists insist on adding an onion stuck with a clove and a bay leaf to the boiling milk.  This is way too fussy and is a pain when you are later ladling the milk out.  Do what thou wilt.

**** Thickness is a bit subjective.  There is a range somewhere between a thin gruel and wallpaper paste/caulk that you should strive for, depending on your preference. If things get a bit thick and heavy, add some more cream and see what that does for you. Do what thou wilt.

Tuesday, May 31, 2011

An Ending and A New Beginning


 I apologize greatly for my negligence in posting lately - things have been busy.  I strive for one or two posts a week, but had to take a break last week because of my hectic schedule.  In any case, I am back with your final emulsion (and likely the most difficult).

As in my own life, I am about to end one portion and begin another, this process will be both the ending of the emulsions, and the beginning of the next set, the five 'mother' sauces, as (secondly) defined  by great French chef Auguste Escoffier*.  Now, these sauces might strike you as some kind of 'foodie' endeavor, the kind of thing that pretentious folks like myself sit around and expound upon to prove their knowledge of esoteric food lore - but, give them a chance.

Let me expand just a bit.  Having these five 'mother' sauces in your cooking repertoire, that is, being able to make them without pulling out a recipe or cookbook, will make your life so much easier.  You can take these mother sauces and add to them in so many ways, and if you do cook by cookbooks, you will start to notice that many recipes are based on one of them (and you will then understand the use of the moniker 'mother').  They have fancy, Francophile names, but all are both delicious and not terribly difficult.  So, without further ado, I give you the end of the emulsions and the beginning of the mother sauces, Hollandaise.

Liminal Hollandaise
- 1 part egg yolk (1 yolk)
- 5 parts butter (absolutely real butter)
- 1 part lemon juice or another acid**
- Seasonings
As you will see, we are using the ratio method again.  With egg yolks, it can be a bit difficult, so let's say a good standard ratio is 1 egg yolk, 5 tablespoons / 15 grams of butter, and 1 splash of lemon juice/acid.

You will also need your trusty whisk and double boiler for this one.  Even more so than the polyvalent pudding, temperature is essential here.  Too hot and your egg yolks will scramble and your sauce will be chunky.  Too cool and you will not get a good emulsion.  No wonder they make those crappy powdered Hollandaise sauces!  Don't be afraid though, as a true Hollandaise is a thing of near-sexual beauty, which envelops you in its smooth textures while at the same time exciting you with its tangy acidity.  Perhaps I have a prurient mind, but you will see for yourself when you taste the first bite.

To make your Hollandaise, begin by melting your butter, you want to have it still liquefied, but not too hot when you add it later on***.  So, melt it and let it sit, so as to cool its head a bit while you undertake the rest of the process.  You have a short break now to catch a cup of coffee or Campari with white wine (depending on the time of day) to fortify yourself for the whisking that is ahead.  You really need to be 100% on point here, so if you are feeling a bit unsteady from a night of heavy imbibing, you may want to grab some toast with chicken livers or a grilled veal kidney to fortify your nerves.

Now, combine your yolk and acid in the top part of the double boiler.  Whisk them in a gentle way over very lightly simmering water.  You want to heat the yolk up a bit, but absolutely not to cook it. Also, furious whisking will surely break the spirit of your yolk - it gathers up a great deal of courage, employing all of its lecithin to enable your sauce to thicken, so one hardly wants to beat that courage down.  After a short bit, your yolk should get a bit lighter in color and will thicken a bit, this is the yolk's finest hour, so don't miss it!  Turn off the heat under the boiler.

In the same way as with the other emulsions, dribble just a small amount of your butter into the warmed yolk and whisk in an intentional kind of way (not furiously as with the other, less delicate emulsions), adding more butter as the sauce allows.  Nothing should be pooling on top, or looking like it might separate.  Whisk until all the butter is incorporated, and you should have a very smooth, yellowish sauce, season to taste and keep just a bit warm until you are ready to pour it over your eggs Benedict.  If your Hollandaise seems a bit chunky, take note of the fact that you cooked it a bit too hot and strain it - it is still fine to use.  Also, taste it and tell me if I am wrong about the sex thing.

Derivatives:
- Béarnaise: Replace the lemon juice with 1 part reduced vinegar, shallots, and tarragon
- Choron: Add 1 part tomato puree with the lemon juice to the yolk.
- Vin Blanc: Add 1 part fish stock and reduced white wine instead of lemon juice
- Bavaroise: Fold horseradish, heavy cream, and thyme into the final product
- Crème Fleurette: Fold Crème Fraîche into the final product
- Dijon: Add 1 part Dijon mustard to the yolk and lemon juice
- Maltaise: Add zest and juice from a blood orange to the yolk instead of lemon juice.
These are just a few, and should give you a good idea of how versatile a mother sauce is!

* Antonin Carême listed four at first, but Escoffier's list is better and has better sauces.
** Some folks like to use reduced vinegar with water, but lots of acids will work here - see the derivatives!
*** A certain Food Network chef advocates adding cubes of cold butter to the warm egg yolk so that you don't break the emulsion, but this is too much in the spirit of convenience for me to possibly advocate.  If you learn to make a Hollandaise with this method, you may as well just go buy it from the store in powdered form.  Harsh, right?

Thursday, May 19, 2011

Polyvalent Pudding


The term 'pudding' is one that usually brings a thick, sweet dessert to mind, one that can take on a variety of forms - unfortunately the most common form is now a powder that you pour out of a box, mix with milk, and heat.  Possibly, it even brings little plastic cups to mind, as these seem even more ubiquitous than the powdered variety with the kids these days.

However, a 'pudding' can be savory as well as sweet, and early 'puddings' were actually something more like a sausage, often being boiled or steamed in something like a sheep's stomach.  Or take the oft misquoted quotable "The proof (aka 'test') of the pudding (usually truncated here and quoted as 'the proof is in the pudding)"  it should have "is in the eating" tacked on the end - meaning that one can only fully test something if one experiences it*.  I include this quotable partly because I didn't know what it meant up until two hours ago, but also because I think you should take it literally when it comes to your puddings. Learn to make a pudding that is not from a box, and even one that is not thickened with cornstarch and you will prove your pudding and yourself.

Polyvalent Pudding
- 4 parts milk (at a minimum, use whole milk, but half & half or heavy cream is even better!)
- 2 parts sugar 
- 1 part cocoa powder (easier to blend, and be sure it is unsweetened - don't use hot cocoa mix)
- 0.5 part flour
- 8 parts egg yolk
- Additional flavorings (Vanilla, cinnamon, be creative!)
As you can see, I have adopted a ratio-based ingredient list here - I find that easier than doing all the metric/standard conversions, and it actually makes things much easier for you if you want to reduce or enlarge the process.  So, in case it looks a bit confusing, for you users of standard measurings, think of the ingredients in terms of cups first - 4 cups of milk, 2 cups of sugar, 1 cup of cocoa power, 1/2 cup of flour, 8 egg yolks.  This will make about 10 servings, but halving is really easy now!  2 cups of milk, 1 cup of sugar, 1/2 cup of cocoa powder, 1/4 cup of flour, 4 egg yolks.  A little math, but so much easier.

Also, you'll note that this is a sweet, chocolate pudding.  For a vanilla pudding (or another flavour that does not involve chocolate) up the flour to 1 part, and be a bit more liberal with your sugar.  In the future, I may do a savory pudding (maybe in another entire animal post - you can make a great blood pudding!).

So, to start things off, add your dry ingredients to a bowl and either sift or gently whisk to combine them thoroughly, then slowly add the milk while whisking, being sure that no clumps are left to surprise you when you eat it later (nothing can wreck a polyvalent pudding like a little uncooked flour bomb!).  Save a small amount of your milk or cream for later, and separate your eggs now - they need to be a bit on the warm side.

Set up a double boiler, or simply a metal bowl set over a gently simmering pot.  Don't try to do this without this kind of setup, you will do an excellent job of scorching your pudding instead of proving yourself and your pudding.  Be sure that the water is only gently boiling, and add your mixture from before to the bowl or the top of the double boiler.  Heat gently, stirring almost constantly until the mixture is hot, test it by touching it to your lips, it should be just at the point where you would need to wait a second before eating, it will take somewhere around 12-15 minutes. Don't let it boil!

Now, whisk your egg yolks with a bit of the leftover cream or milk and bring them over near your hot mixture.  Using the skills you have cultivated from your previous emulsions, very slowly add a bit of the hot mixture to your egg yolks, whisking constantly.  Continue adding your hot mixture until the egg yolks are blended, and they feel relatively warm to the touch.  You can now pour this mixture back into the mixture on the top of the double boiler.  You need to be careful during this step, for if you add the hot mixture too quickly, or don't whisk enough, you will have scrambled egg yolks on your hands.  

At this point, heat the blended mixture thoroughly, stirring constantly for something close to 45 minutes (You may want to snag a small glass of grappa to sip on during this time to keep yourself from growing too unsteady).  Keep an eye on things, as it should start to thicken.  You don't want things too gloppy, so pull it off the heat earlier if it looks thick in a satisfactory kind of way.  You can add a small knob of butter during this time  if you would like - it gives your pudding a wonderful richness.  You can also add some shaved chocolate bar during this time to add more chocolate flavor and thickness.  When the perfect thickness is achieved remove it from the heat, add any flavorings you would like,  decant your pudding into serving bowls** and chill it for 1 to 24 hours, depending on how cold you like your pudding.

I would suggest starting with this chocolate pudding before trying another flavor.  You can also just take the cheater's way out and use a mixture of equal parts cornstarch and water, with no flour or egg yolks.  Your pudding will be far less demanding, and will get thick after only a few minutes of cooking, but ask yourself, "Do I really want to be that kind of person?"***

If you make it this far, you will understand that true pudding is a test, it requires you to prove yourself at a few junctures, and once you have you can truly say "the proof of the pudding is in the eating" while you enjoy it topped with some crème fraîche.

* You know, like when you tell someone that they shouldn't take Ambien while operating an industrial drill press and they say "Dude, don't knock it until you've tried it."

** If you like skin on top of your pudding, cover them with plastic wrap while chilling them.  

*** No, you do not.


Monday, May 16, 2011

Incredible, Edible Raw Egg Mayonnaise


 Raw eggs have gotten such a bad name.  Some of this is with good reason, as industrial egg-production centers haven given raw eggs a very bad name with scary Salmonella and all. So, practicing a bit of food safety with regard to commercial eggs is not a terrible idea (actually it is not a bad idea in general) - but by food safety I don't mean bombing your kitchen and body with antibacterial cleansers because a dot of raw egg touched your finger and a part of the counter.  The hilarity of spraying a concoction containing who-knows what (because few actually list their ingredients, or if they do, they disguise the most noxious ones), out of a possibly aerosol container could keep me laughing longer than a broken chip basket given as a gift. What I do mean by food safety is common-sense stuff that you already do, so I won't list it.

Today will be a good way to gently place yourself into the world of using and eating raw eggs.  You can do it through a wonderful emulsion (see the last post for more on that), commonly called mayonnaise.

Raw Egg Mayonnaise*
- 1 egg yolk
- 1 cup / 240 ml oil (this can be any type**)
- a gentle throw of salt, sugar, and dry mustard
- a gentle splash of lemon juice and/or vinegar

The jingle, "Bring out the ----man's and bring out the best!"  would be better rephrased by replacing "the best" with "the worst" in the world of mayonnaise.  The mayonnaise that you can make at home with a couple of ingredients will be far superior (maybe not the first time) to anything that comes in a shelf-stable container.  By making your own mayonnaise you can 
1) ensure that superior ingredients are used
2) Actually know what those ingredients are
3) Start putting mayonnaise on everything you eat because of its beautifully chirpy taste.
All of these are worthy reasons to give this process a try.  
First, get your egg yolk separated from the white.  If you would like to drastically reduce the likelihood of Salmonella in your eggs, don't use the eggshell to separate the egg - use your hand or a egg separator (totally unnecessary, but good for those who don't like the feeling of egg).  Put it into a bowl with the dry stuff, and whisk the egg yolk while adding a splash of the acid element (lemon juice or vinegar).  This acid addition is your Salmonella insurance. Make sure all of the parts sans the oil have gotten to know one another in a truly intentional way.

This mixture is the philosopher's stone to your mayonnaise alchemy - it effects the transformation.  

Now, as with your bottom-rung dressing, add your oil, a few drops at a time, whisking heartily while doing so (also remember to grab a liverwurst and toast along with a whiskey sour beforehand as this involves a good bit of whisking).  Gently add more oil in an intentional kind of way, whisking all of the time, and never allowing the mixture to become clumpy-looking, or having oil pool on top.  Add and whisk until you get the white peaks of a beautiful mayonnaise, and all of the oil is gone.  Do not give up on this step, as the lead of cheap oil will become the gold of mayonnaise if you persist.  You can also do this in a blender or mixer to do this, but ask yourself - "Do I really want to be that kind of person?"***

Sometimes, the alchemy can be disrupted, and you can be left with a disgusting blend of whitish globules swimming in oil.  If this occurs, all is not lost - simply get a new egg yolk, whisk it, and add the globby mixture to it as you would oil in the first instance.  Things should come together for you.  

Finally, taste your mayonnaise, and adjust it as you would like.  Mayonnaise is a good place to practice flavoring - add acid for more chirp, sugar if things are a bit too chirpy for your taste, and anything else you would like (such as the classic "chipotle mayonnaise" or "wasabi mayonnaise" - for some reason having either of these on a sandwich in a restaurant  seems to  up the price by like 3 dollars).

* Consuming raw or undercooked foods can open your eyes to a new world of eating that many in the food establishment think you are too stupid to discover for yourself without contracting a food-borne illness.  

** The very best mayonnaise is made with olive oil.  However, this is one instance where I would suggest getting the hang of the process with a cheap oil and moving onto olive oil after you know what you are doing.  

*** No, you do not.

Tuesday, May 10, 2011

A Break for Emulsion


In reflecting on the series of "Entire Animal" posts, I felt it was reasonable to take a break - hopefully returning to them in the future.  The posts were taking me a long time to compile, and I feel as though my readership might benefit from a respite, and a return to more comfortable pastures of eating.  

Hence, I will be going with a different series - emulsions.  These take considerably less effort to procure, produce, and are typically items that you would eat on a regular basis (I was all ready to run my post on tongues too!).  So, over the  next week or two, you will all have the chance to work on your emulsifying skills.  We'll start simple.

A Bottom-rung Dressing
- 3 parts Oil (Olive is best, and you can use the coveted Extra-virgin variety here)
- 1 part Vinegar (Whichever is your favorite, but stick with one not made from petroleum, i.e. white)
- An emulgent (more on this below)
- A creatively restrained blend of herbs and spices
An emulsion, for the uninitiated, is a blend of two liquids that under normal circumstances, do not blend.  Very simply here, when you pour oil and vinegar  into a jar, they separate, the lighter oil on top and the vinegar on bottom.  You can shake the jar and the oil will, for a short time, become emulsified, but when you let it stand for a bit, they separate back out.  This would be a very unstable emulsion.  What we'll make today is a bit more stable, though things will eventually separate out if left undisturbed.

So, your very best friend in the emulsion is your whisk.  The whisk is a beautiful tool, shining wire hoops bubbled out on top with glorious airspace between them.  If you have a crappy whisk, invest in a nicer one, one that feels right in the hand.  Your emulsions will thank you.  

On to the dressing.  Salad dressing is a great example of a prolefood.  The lowest common denominator are those packets that you add to a cruet with vinegar and oil.  These are mostly salt, and mostly overpriced.  The bottles at least can approximate the correct emulsficatory technique, but are still overpriced, and often use cheap oils and vinegar.  When you make your own bottom-rung dressing you can add to and use the highest or lowest quality oils you would like.  This is just a starting point, be creative in your endeavoring.  

Start by measuring out your oil and vinegar.  The ratio is 3:1 (oil:vinegar), so you can make as much or as little as your would like.  For your first emulsion I would suggest a Goldilocks approach, just right.  Don't start too small (e.g. 3 Tbsp to 1 Tbsp), but 18 cups to 6 cups is a bit too large.  Shoot for the middle road.  Put your vinegar into a easily held bowl.  

Now, for your emulgent.  You can make a dressing with only vinegar and oil, but if you add an emulgent, or a emulsificatory helper, things will hold together more easily and for a longer period of time.  The triumvirate of emulgents are: mustard (preferably dijon), honey, and egg yolk*.  Choose one and add it at something like a 3:1 (vinegar:emulgent) ratio.  Each will give the dressing a different kind of character, and all should be tried.  Whisk the emulgent and vinegar together with any flavorings you'd like to add**.

The actual emulsification is a kind of magical process, and will produce a end result that is vastly superior (and vastly cheaper) than the garbage that passes for dressing at the store.  To emulsify, get your vinegar mixture going with the whisk (be vigorous here, you may need a Campari and white wine, along with a slice of pheasant & trotter pie to keep yourself from getting too unsteady during this process).  Add just a drop or two of the oil*** and keep whisking, it should blend in nicely.  Add the oil, falteringly at first, growing more bold as time goes on - but never stopping your vigorous whisking.  If oil seems to be pooling on top of your mixture, stop adding it and really lay into the whisking until it disappears.  Once all of the oil is added, the mixture should have an opaque look to it (the color will depend on the vinegar you used).  Give it a taste and season with salt and pepper if needed. 

If your mixture quickly separates into oil and vinegar, the oil was added too quickly.  Your hand must be patient and calm when adding the oil.  Sloshing the oil in haphazardly will result in a poorly emulsified dressing.  All is not lost should this happen - try adding a bit more emulgent and really whisking it  - it may find itself and come together.

* Do not fear egg yolks.  The vinegar you are using is plenty acidic and will make the Salmonella that might be dwelling on your yolk very unhappy.  I have been making dressings emulsified with egg yolk for years and have yet to become sick from one.  The dressing emulsified with egg yolk will have a richness and body that will be unrivaled.

** Flavorings can be in many forms.  Just remember that any liquid additions should be balanced with the vinegar so that a good ratio is maintained (e.g. if you want to add lemon juice, or a fruit juice don't add it in excess of the vinegar, reduce the vinegar to compensate).  Dry or solid ingredients (roasted garlic, YUMM-O) don't require this kind of fussiness.

*** You may want to invest in some kind of squeeze bottle or other cruet that allows you some modicum of control over the flow of oil.  I use a nice, food grade bottle like those that they use for ketchup at your local hot dog stand.  Makes a big difference.

Tuesday, May 3, 2011

The Entire Animal: Step 3


The liver has long been recognized as an important organ.  Even in Hesiod's Theogony (8th century BCE) we can read about hapless Prometheus:
Prometheus he [Zeus] bound with inextricable bonds, cruel chains, and drove a shaft through his middle, and set on him a long-winged eagle, which used to eat his immortal liver; but by night the liver grew as much again every way as the long-winged bird devoured in the whole day. (521)
One interesting bit of trivia here is that the liver is one of the few organs which can actually regenerate a bit, so maybe the ancient Greeks knew a bit more than we think.
The picture above is of an artifact known as the Liver of Piacenza. It was found in Italy in the 19th century, and is covered with the names of Etruscan deities - it was likely used by priests that practiced haruspicy (hah-ruhs-puh-see), or divination by means of liver examination (other entrails were also examined).

So, let's get into the wonderful world of larger livers

The Large Liver
- 1 Liver from a calf, ox, pig, or lamb
Liver has long been the thing of revolting dinners, jokes, and is still disallowed in my mother's home*.  Clear your mind of these stereotypes and get yourself a liver.  First and foremost, the liver of a larger animal is a gorgeous organ.  It is glossy, has a bit of a squeak to it, is wonderfully smooth in texture, and if it is from a happy animal, a kind of burnished red colour.  Liver has been consigned to the tables of dour Englishmen, even by supposed offal-lovers! This is quite unfortunate, especially because liver can really put the wind back in your sails after a taxing day.

Most folks are really grossed out when they realize that the liver, like the kidneys, are filtration organs, hence your eating the organ exposes you to lots of foul impurities.  It is for this reason that I cannot stress enough the importance of obtaining your livers from a reputable source.  The supermarket just won't cut it here, and I promise you that the benefits reaped from a happy animal will be substantial, especially in terms of taste.

Finally, the possibility hypervitaminosis A (overdose).  I wouldn't really worry about this factor, as you have a greater chance of giving yourself hypervitaminosis A with the crappy multivitamin supplements than by eating liver**.  In fact, a lot of folks are probably a bit deficient in this Vitamin, as the form in carrots and other plants is not as easily converted by the body as the forms in liver and egg yolks (yet another reason not to engage in low-fat/cholesterol diets).  


Liver Principles:
- Get your liver from a good source, look for shiny, reddish-brown livers.  A good liver has a squeak not unlike shoes on a gym floor.  Liver is a great, inexpensive way to add some meat to your diet. 
- If the impurity factor, or taste factor bothers you, try this:  soak your livers in lemon juice (or some other acid) for a few hours, giving them a rinse before preparation.  You can also try milk/buttermilk.  I like lemon juice, because it tenderizes the liver, and leaves a nice chirpy flavor after cooking.  
- Liver lends itself best to quick cooking.  Slice into medallions or longer pieces and sear in a hot pan with some butter or olive oil.  Grilling is also an excellent preparation, though slicing a bit thicker, as well as careful monitoring is in order.  Liver can go from velvety and tender to mealy and unpleasant somewhat quickly on the grill.  The less you cook your liver, the better it tastes.
- Mushrooms and Onions seem to have a kind of natural affinity with liver.   Being that both of them prefer hiding hearkens back to the haruspex being amazed at the unveiling of the liver and the revelations it would bring.   Don't be afraid of adding a delicious sauce like Hollandaise, Mayonnaise, or a beurre blanc/noisette as the richness pairs well.  Liver has enough strength to cut through bold flavours.  
- Liver, if prepared correctly, will not stink up your house.  When you overcook liver and volatilize all the impurities, it certainly can.  Another reason to lightly sear your liver (and soak it).

*Whenever mom was out of town, my father would gleefully bring home a slab of liver to cook with onions. 
** If you happen to be in a situation where you have killed a polar bear, husky, or other arctic mammal - the liver would be one thing to avoid as they tend to have very high Vitamin A content and can cause problems.  Otherwise, if you eat a varied diet, hypervitaminosis A probably won't be something you need to worry about in the least.  You might also take a break on your multivitamin (if you do take one) when eating liver.

Tuesday, April 26, 2011

The Entire Animal: Step 2

Today's entire animal entry could also be called The Mystery of the Chicken

When you purchase a whole chicken* (or really most fowl, but chicken is most common), happy or not, you usually receive a bag of some sort, hidden within the body cavity.  For years I simply threw this bag away, not even bothering to open it and seek the enlightenment that is within.

Relish the mystery hidden within the chicken, do not get rid of it.  Today will be about identification and principles of use.

The Mystery of the Chicken
- 1 bag from within the cavity of a fowl

So, first, for a tour of the (most typically included) parts:
Chicken Liver

Chicken Necks
Chicken Gizzards
Chicken Hearts

Now, do not fear these parts.  All are delicious, and their being labeled as 'grisly' or 'gruesome' or 'disgusting' is more a social convention from a society that prefers eating blobs of vaguely meat-like substances that do not remind them that an actual animal has died to give them food (think boneless, skinless, chicken breast).  If you are lucky (like me) and have a farmer from whom you get your chickens, you may also be able to procure some less common fare like chicken's feet and lungs.

Chicken Liver:
- The liver usually has a vein or two running through it.  You can simply slice it in half and gently pick it out with a finger or knife.  You can also leave it in, but this can get a bit rubbery when cooking.
- The liver should have a nice reddish to reddish brown color to it.  If it has taken a greyish-brown or greenish hue, it is best to wait until next time to eat it.
- If you dislike the 'bloody' taste of liver, you can soak your chicken livers in  salty milk or buttermilk for an hour or two and this will lessen the flavor.
- Livers lend themselves best to quick cooking or pulverization.  That is, either fry your livers very quickly and serve them rare, or cook them thoroughly and mash them into a paste (or in a more refined manner, pâté).  Overcooking results in rubbery livers that are unpleasant to eat.
Chicken Neck:
- The chicken neck is a versatile piece of the chicken, don't be afraid of its boniness or in-your-face reminder that there used to be a head attached. 
- The meat on the chicken neck is really the same as is found on the wings or thighs, dark and robust.  
-  You can use the neck in your stocks, as it lends its robustness well to the overall flavor (do remember to pick the meat off it and eat after you have finished your stock though).  Otherwise, an excellent use is to thread a skewer through it, add a nice spice rub and some fat and grill away!  It is like a bony popsicle, perhaps only rivaled by grilled veal tails.   Smoked chicken necks are a great idea that I just now thought of.
Chicken Gizzard:
- The gizzard is the one part that I can understand a bit of revulsion towards.  The texture is gritty, as chickens grind their food with their gizzard rather than teeth.  You must give it a chance though, don't think of the texture as 'gritty' as this reminds one of sand or something generally inedible.  Think of it as 'pleasantly crunchy.'
- Gizzards, if you are unable to eat them as is, are also good for adding to stocks.  After a few hours of boiling, they can be added to livers and ground into a nice pâté.  For cooking, a nice breading and frying in duck fat or beef tallow really helps the gizzard to find itself.  Crunch and pop!  Great with a Campari & White wine before dinner.
Chicken Heart:
- The heart is an unsung hero of chicken offal.  Collect as many hearts as possible, as once eaten, you will not be able to easily resist eating another. There is often a bit of bubbly fat around the heart - this can get a bit tough when cooked, so trim it off. 
- Cooking the heart is best done in one of two ways.  The first is to split the heart open (marvel at the chambers and valves), pound it with a hammer and sear it quickly.  The second is to thread a number of hearts on a skewer, season, and grill whole.  If you enjoy Gushers candy, you will definitely enjoy the way that the grilled hearts explode when you bite down.  
If you are serious about eating offal, I might even be persuaded to give up a recipe or two for some of these bits if asked nicely.  Love your animals, and eat everything they offer.

* Please buy whole birds.  Those Styrofoam (or even supposedly eco-friendly cardboard) trays holding an offering of meaty globules represent serious effrontery  to the memory of the nourishing animal.  You can certainly butcher the bird into component parts once you have it, but force yourself to stare at the very corporeal animal prior to doing so.
 

Tuesday, April 19, 2011

The Entire Animal: Step 1


In the ensuing weeks, I am planning on dedicating a post a week to eating the entire animal.

What I mean by this phrase is learning an art that has mostly gone by the wayside in American cuisine, an art that many have and still do engage in.  That is, when eating a sirloin steak, being equally ready to eat the kidney, shank, liver, brain, or heart of the cow.  When eating pork ribs, also eating the feet, the stomach lining, the spleen, and head of the pig.  

Now I realize that for some of my readers, this kind of eating might just turn your stomach.  So, instead of carving into a delicious grilled heart straight away, we'll take some stepwise motion and start small.  Baby steps.  Also, because the recipes for each step are numerous, the entries will take the form of general principles to remember when dealing with the whole animal.  

So, without further ado, let's start our journey with...

The Whole Fish

- 1 entire fish* (For the sake of kitchen messes, you can ask your fishmonger to scale and clean the entrails out of the fish.  However, if you have a garden or are growing plants in some form, ask for the entrails, grind them up into a paste, add to water and use them for some excellent, free fertilizer)
So much of our food system is based on processing the items we eat into non-recognizable forms.  When we eat 'fish,'  we usually mean that we are eating the complex musculature running along the sides of the body of a fish, aka a fillet (or perhaps a loin for the large pelagic species).

The entire fish is usually a kind of gruesome reminiscence that we have of 'primitive' cultures, with the now-unblinking eye staring back at you as you try to enjoy the food.  However, with this understanding of eating 'fish' has also come the specter of cooking fish.  Namely, the specter of overcooking fish.  Take a look in most cookbooks, and on the seafood recipes there is some kind of warning about watching your fish so that it does not become overcooked. 

When you are dealing with a thin, boneless, skinless fillet - overcooking can surely occur in a matter of a minute or two.  Hence, I advocate you start your entire animal eating with an entire fish and allow yourself to relax a bit with regard to incorrect cooking.

Principles:
- Find a good fishmonger near you.  This can be difficult, as people are usually ok with the utter horseshit that they sell you at the supermarket.  
- After you have found a reputable fishmonger, skip the fillets and go for the whole fish.  There are a number of species that lend themselves particularly well to being left whole. Seek one that is from relatively close by (for those in the middle of the country, choose the nearest coast!), and ask your fishmonger if you are unsure.
- When selecting a whole fish, the freshness is in the eyes.  If the eyes look cloudy or milky, skip that one.  The eyes should be relatively clear, and the fish itself should not have a strong odor**.  Try to buy your fish on the same day that you will use it. Keep it cold.
- A whole fish will have lots of flavor in and of itself.  Some folks add any number of sauces, spices, and herbs to their fish, but these preparations tend to completely overwhelm the delicate flavors that lie waiting for you in a whole fish. Thus, when cooking your fish, be very restrained with your herb choices, and choose fresh herbs if available.  The combination of lemon, thyme, parsley, and butter has a heady synergy with most types of fish.
- Additionally, your fish will have lots of moisture already in its bones, which are going to stay sealed within the fish instead of being thrown into the garbage. The belly of the fish will also be split, allowing you a great place to nestle some modest herbs and butter. Don't slash your fish's skin - this aberration of modern cooking methods dries the flesh out and lets all the juices run into the pan instead of into the meat.
 -  The actual cooking should not scare you.  Splash a bit of fat and moisture into a pan, nestle your fish in (you may have to lop off the head to fit it, but try not to), and pop it into a hot oven.  Low and slow is not for fish.  Go for no less than 205º C / 400º F when cooking a fish, and perhaps more for smaller fish.  For time, 7-10 minutes on each side should be really adequate, so 14-20 min. total (unless you have a very large fish).
- Dig in!  Don't be afraid of bones, just be careful and spit them out when you run into one.   Also, you should relish the difference in flavor that the flesh takes on as you move along the fish.  Put the whole animal on a plate and dig in with your friends and family.  A whole fish is a great family-style meal. 
- Finally, don't forget to stare the fish in the eye, thank her or him for nourishing you,  and tell her or him that perhaps, one day, your own body will nourish other fish.
* The fish in the picture is a sea bass from the east coast.  Try to choose a fish that is not over-fished, and is not from a faraway place.  You can also find flat fish and do them in the same way, although their thinness might be reason to knock a few minutes off the total cooking time. If you can find a grey mullet, do avail yourself of this opportunity, as it is a rare treat.

** People associate a fishy odor with all fish.  Such is a unfair characterization.  Fish only smells strongly if it is quite old.  Fresh fish takes on many scents, from a kind of cucumber bouquet for the cold-water species to something far more musky for warmer-water ones.  Very old fish also has its place, despite the American aversion to all things smelly.  Sauces made from fermented seafood products are delicious. 
 

Friday, April 15, 2011

Baby Got Back Bacon


Now, you may know today's bacon by another name, Canadian Bacon, but don't call it that.  I have now done extensive research and testing and have found that in asking two (2) persons from Canada, neither was aware of what Canadian bacon was.  So, what you are making today is really Back Bacon, owing its nomen to the fact that it is derived from the center cut pork loin, which is from the back of the pig.  

Back bacon is a very cool product, and is a kind of hybrid form that combines the Mother Brine and the Dry cure from the Belly Bacon.  It also uses a more readily available cut of pork, and takes less time.  The best of all worlds!

Back Bacon

- 1 Beautiful Pork Loin (not tenderloin)*
- 2 L / 2 Quarts of Water (The amount is important, so I am including it)
- 75 g / 3 oz. Salt
- 30 oz / 1 oz. Pink Curing Salt (see my bacon post for more info)
- 110 g / 3.5 oz Sugar
- Creative but restrained seasonings and flavorings (Sage, Rosemary, and Lemon are nice pork counterpoints, but you can just go with some bay leaf and peppercorn too)
For this product, if you would like, you can leave out your Sodium Nitrite, but know that your loin will end up a somewhat greyish brown color and have a bit less piquancy.  It is fine to use in this form, but perhaps add a bit more regular salt if you intend to leave out the Nitrite.

So, to start, make your brine by boiling the water, adding the salts, sugar, and spices and allowing it to truly find itself over the course of a couple hours while it cools.  I like to let it cool to about room temperature on the stove, and then stick it in the fridge to really get it to the point where it is not going to cook the pork at all.  This would be ideal.  One other possibility would be to boil only half of the water, dissolve the components, and then add the other half as cold water to really pull the temp down quick.  This way seems to cheat the process and the flavor-making a bit, so don't do it unless you are really in a pinch.

After cooled, add your pork loin.  It should be heavy enough to sink, and lurk just below the surface of your briny cure like a hippo or a Zambezi River Log (for Andrew L. if he should be reading).  Let it lurk for 72 hours.  Then, allow it to come up for air.  Put it on a rack in the fridge to dry out a bit.  The outside should feel a tad tacky, and this is perfect.

The final step is to either smoke or roll your bacon.  You have the basics of smoking elsewhere on the blog, but smoke this guy to somewhere in the 65º C / 150º F range.  For rolling, you can get some cornmeal, and heavily roll the loin in it.  Then, roast in a very gentle oven (135º C / 275º F) for a couple of hours, until the temp is about the same.  Slice thinly or thickly and enjoy. The above picture is my cured, but not yet smoked back bacon.  Three days! Back Bacon! 

* Pork tenderloin is a delicious, thin cut of meat great for medallions and searing, but don't mistake it for its tougher cousin the back loin, which is from the meat all along the ribcage.  Get a pork loin from a happy pig and you will be rewarded with a happy slab of bacon.  Get a whole loin, which should run about 3-4 lb. depending on the size of the kind pig that gifted you with it.  This way, you have 3-4 pounds of wonderful back bacon.

Wednesday, April 13, 2011

Redeeming Fat


During my years in undergraduate education, I spent a month or so in Morocco.  During this time, I desperately wanted to learn the processes and practices that produced the amazing tajines* that I grew accustomed to eating for many of my meals.  I was usually prevented from doing so by the simple fact that I was male, and especially when staying in the traditional home stays, cooking was explicitly not what I was supposed to be doing.  However, finally, after a few weeks, we made our way into the mountains outside of Marrakech to a Berber village and I learned how to cook a tajine (after enduring some laughter and name-calling from the men).

This meandering tale is all to get to the moment in the cooking process where we added the fat.  I held a small clay bowl in my hand, and it held somewhere in the vicinity of a cup.  An older woman brought out a jug of olive oil and handed it to me, motioning for me to fill the bowl and pour it into the dish.  I filled the bowl once and poured it over the dish, thinking that it seemed like a lot of oil to be adding.  However, she motioned for me to fill it again.  I did so again, and tried to pour it on a different dish, but she shook her head and pushed my hand back to the first.  I added it, thinking that it the amount of oil was now fairly excessive.  Except, I was to foiled again, as she motioned for me to fill the bowl a third time, and pour it over the same dish.  The chicken and vegetables were positively swimming in olive oil at this point. 

My non-fat, low-fat American self immediately began thinking about how olive oil was at least a "healthy oil,"  but  the three cups worth surely seemed over the top.  I was imagining myself having an intense gastrointestinal disturbance after eating this dish (and thinking about how I would manage this on the "squatty-potty" toilets). I was also marveling at how healthy, generally fit, and vibrant the people in the village were.

However, miracle of miracles occurred.  No GI disaster, only the most delicious, satiating dinner I had enjoyed in possibly my entire life.  I was a fat convert that day.

There is a great deal of nutritional controversy about the role of fat in one's diet, especially saturated fat.  You can go and look all of that fun information up by yourself if you find it interesting.  What I am more interested in is how neutered our cooking becomes when  we subscribe to low or no-fat propaganda.  So, allow me a moment to reflect on adding and not adding fat to your cooking.

Due to a less than certain correlation between poor health and saturated fat, we have been inundated with so-called "solutions" to this problem in the form of cheap, mostly rancid plant oils.  Many of these oils are usually hydrogenated, which involves metal particles, soap, electricity, and radiant yellow dye, none of which sound appetizing.  So, my first call is for you all to use better fat.  I have instructions on rendering pig, beef, and sheep fat.  These are all relatively inexpensive if you can find a good source for the fat.  You can also render chicken, goose, and duck fat.  There is nothing in the world as satisfying as a pie crust made with lard, or potatoes fried in duck fat.  If you find all of these too grisly for your tastes at the moment, you should firstly work on changing  your tastes, and secondly use butter,  olive oil**, or coconut oil (in that order).  All other fats are strictly second-class.  They are disgusting, even if they promise that they are made with an expeller (which makes them both disgusting and expensive).  There is something odd about a fat that is not solid at room temperature (or even fridge temperature) suddenly being so.

The second call is for you to think about fat as a way to make what you cook amazing, and to be free about adding it wherever appropriate.  There are a couple of decent dishes that don't involve a good bit of fat, but they are few and far between.  Think of adding your quality fat not as a indulgence, but as a typical practice.  I am not saying that you necessarily need to add three cups of olive oil to everything you cook.  However, a nice knob of butter is just amazingly delicious when added to tomato sauce right before you serve it.   

The third, and final call is to never take the fat away from a dish that is supposed to have fat in it.  Such effrontery is a disrespect to the ingredients, as well as the Platonic concept of the dish itself.  Look at what gets involved when you take the fat out of ingredients that ought to have them there.  I saw non-fat cream cheese the other day, it involved a number of very strange ingredients, including a dubious "gum" or two that likely took the place of...the fat that is supposed to be in a product with "cream" and "cheese" in its name. 

Obesity and poor health are present in our culture in a major way, and I don't think it has much to do with fats.  Lots of cultures all over the world use very large amounts of fat in their cooking and daily eating.  We are one of the few western ones with a low or non fat substitute for everything we can imagine, yet no one seems to be benefiting from it.  Yes, fast food has lots of fat in it, but I am not advocating fast food here, as they are perhaps the biggest users of hydrogenated and other crappy fats - not to mention that most folks give the old pancreas a serious workout when they eat a refined flour bun, processed potatoes, sweetened sauces, and the ubiquitous carbonated water with HFCS added.  Think about the healthy Berbers the next time you worry about the fat content of your food.

* A tajine is a kind of meat and vegetable stew cooked slowly in a special clay pot.  It is sometimes served with couscous.

** Don't waste your money on Extra Virgin Olive Oil if you are cooking with it.  Use the regular stuff for cooking.  EVOO is great for dressings or drizzled over an already cooked meal, but when you heat it up for frying in pans and such you destroy a lot of the flavor that is gained by its cold-pressing, as it has a relatively low smoke point.  It would be a better plan to buy a large amount of less-expensive, non-EVOO olive oil for your cooking, and to spend your money on a smaller, pricier, yet higher quality EVOO.